
How to connect PracSuite to Routiq.
Connect PracSuite to Routiq so Robyn can read your live diary, offer real times and book directly into PracSuite. Here is the full setup.
About 15 minutes·5 steps·No setup fees
Before you start
- A PracSuite account with access to Settings then Integrations, so you can generate a client key.
- A Routiq account. If you do not have one yet, start the 7-day free trial. No card required.
- Step 01
Create your Routiq account
Go to app.routiq.ai and sign up. It takes a minute and no card is needed for the trial. You will land on your Routiq dashboard, where you provide your PracSuite key in the last step.
- Step 02
Enable API integrations in PracSuite
In PracSuite, go to Settings then Integrations then API. Switch on Enable API Integrations, then choose Add. PracSuite generates a client key. Access needs two keys working together: the client key you generate here, and a vendor key that Smartsoft issues to authorised developers like Routiq.
Keep your client key secure. It grants access to your clinic's data and can be revoked at any time.
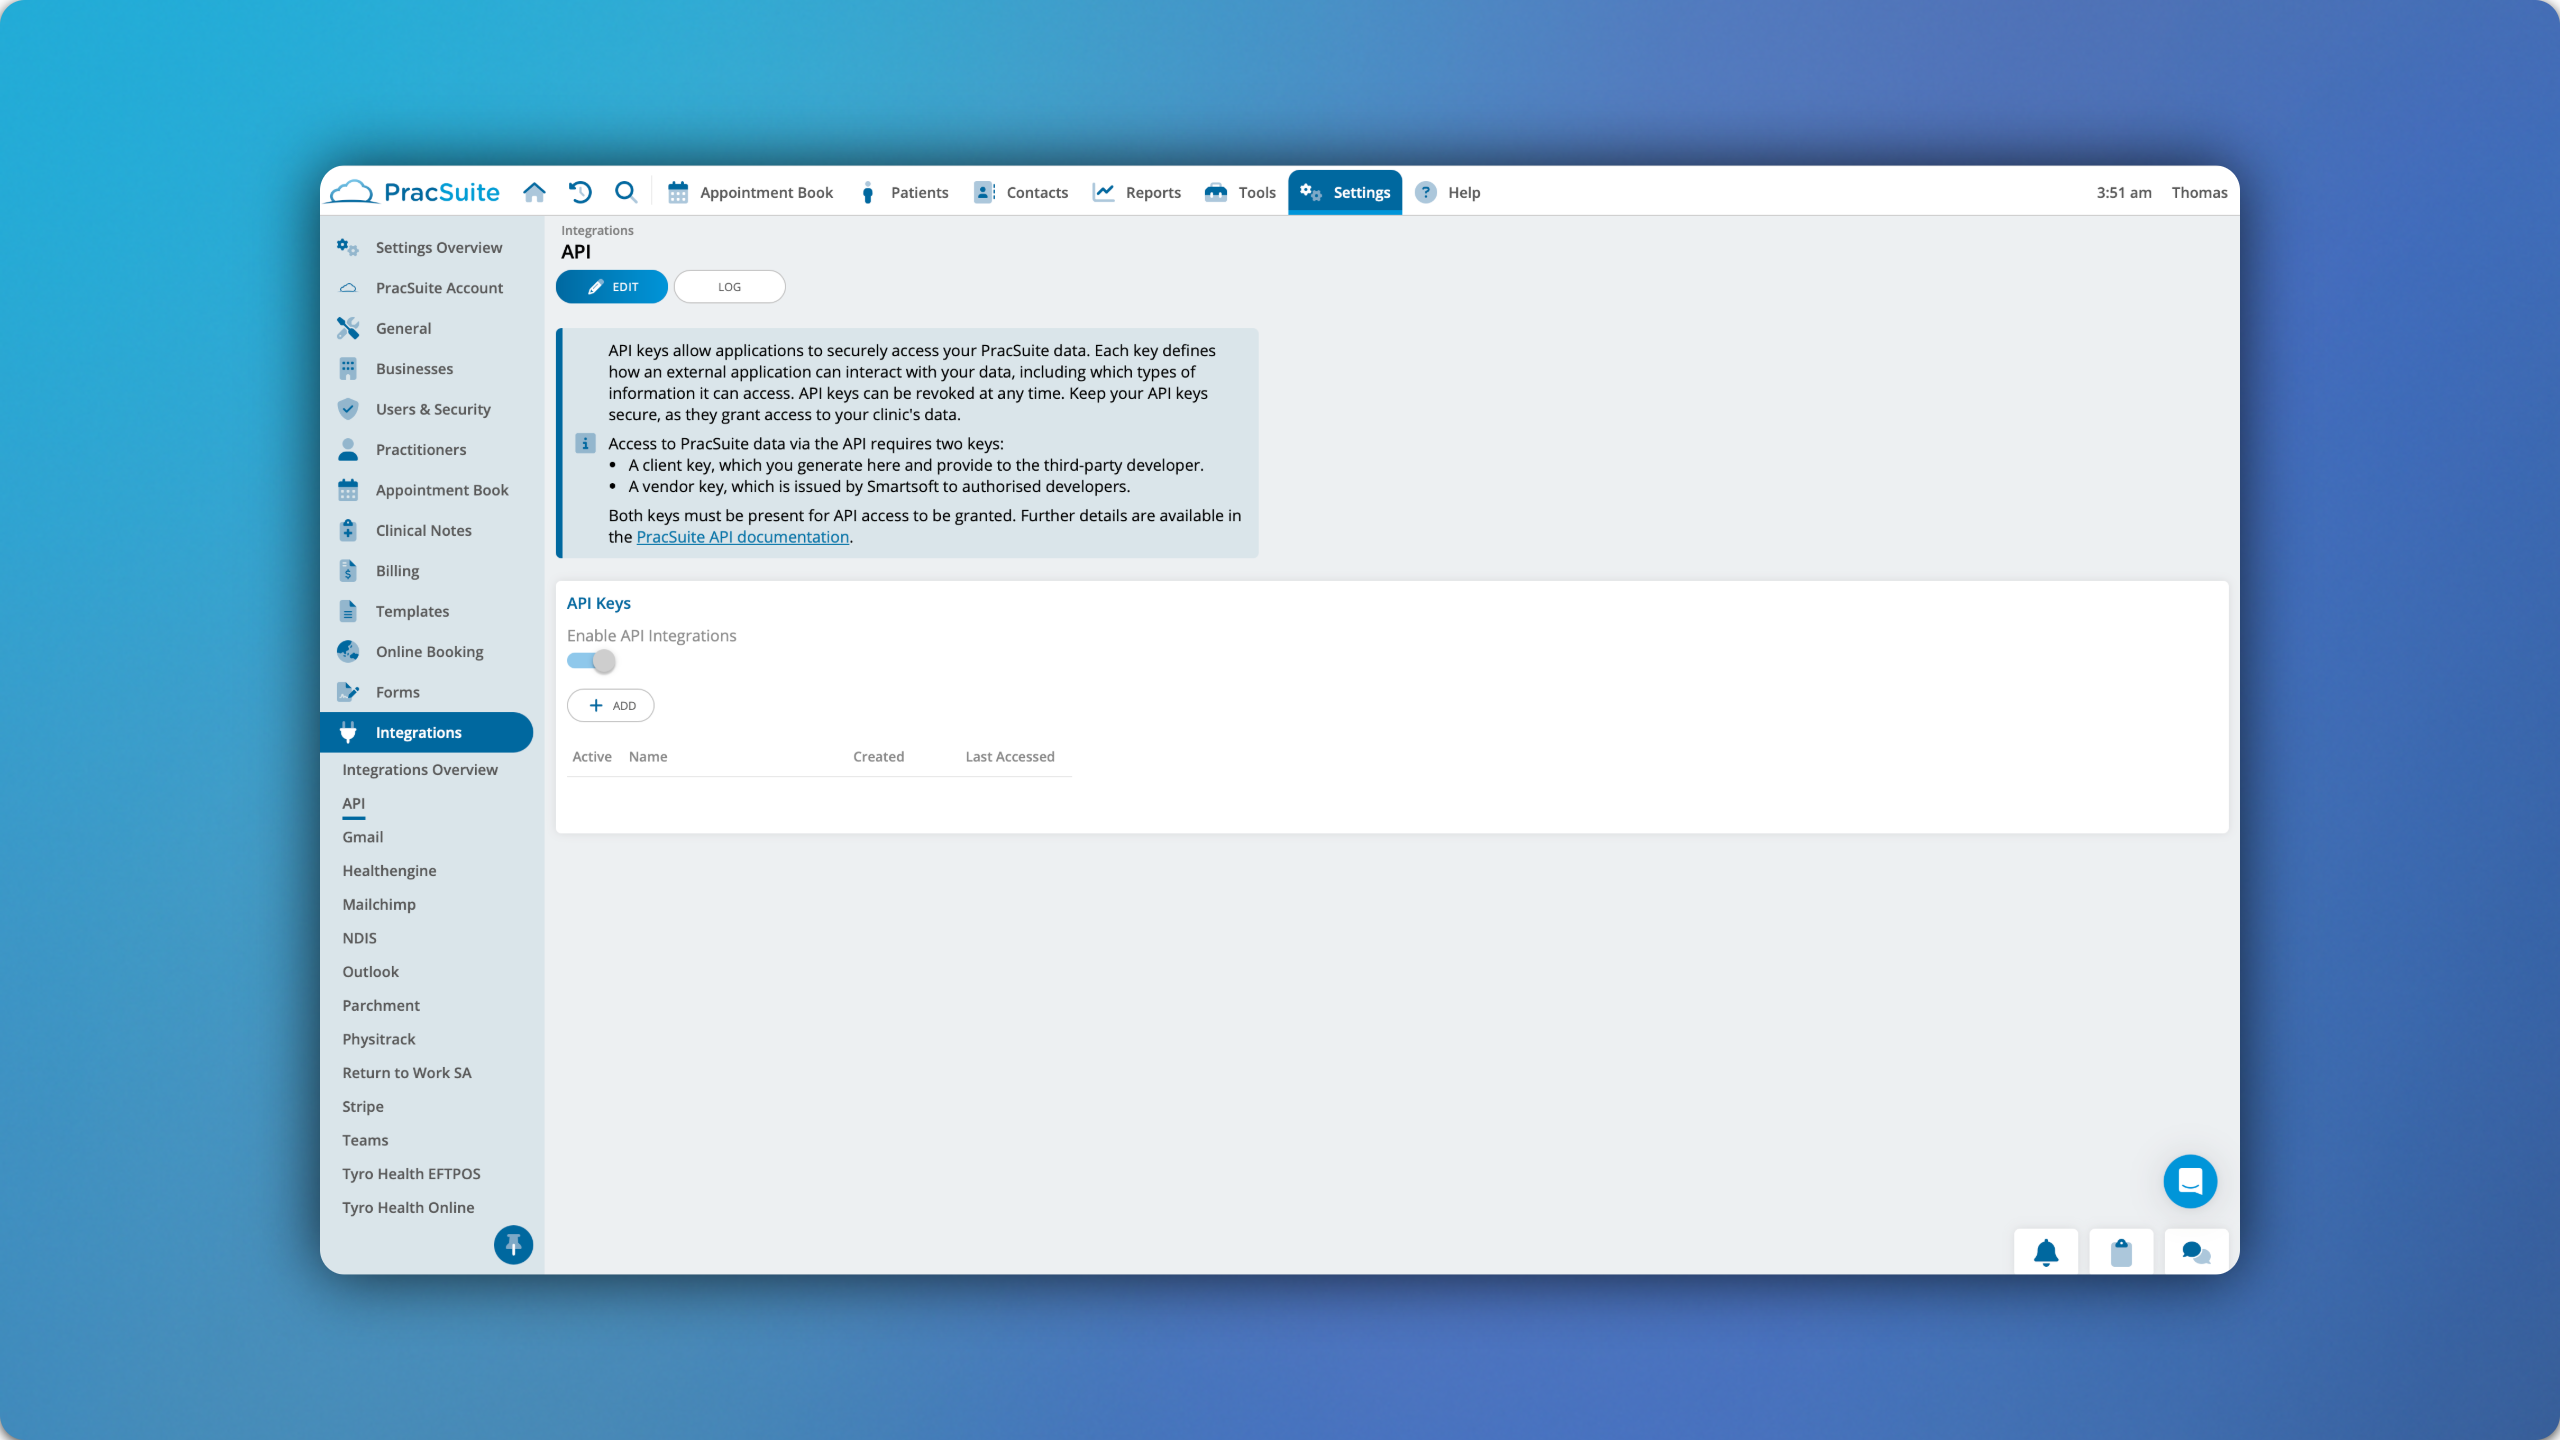
PracSuite: Settings then Integrations then API. - Step 03
Choose what the key can access
Each PracSuite key defines which types of information it can access, so a brand new key can be valid and still read nothing. On the same API screen, open the key you just created and grant it read access to your businesses, practitioners, patients and appointments. Robyn needs all four to offer a real time and book it.
If Routiq tells you the key has no API permissions yet, this is the step to come back to. The key itself is fine, it just has not been given anything to read. If you cannot see the permission options on your login, PracSuite support can enable them for you.
- Step 04
Give the client key to Routiq
In Routiq, open Integrations then PracSuite and paste the client key. Routiq already holds the Smartsoft vendor key as an authorised developer, so once both keys are present PracSuite grants access and Robyn can read the diary.
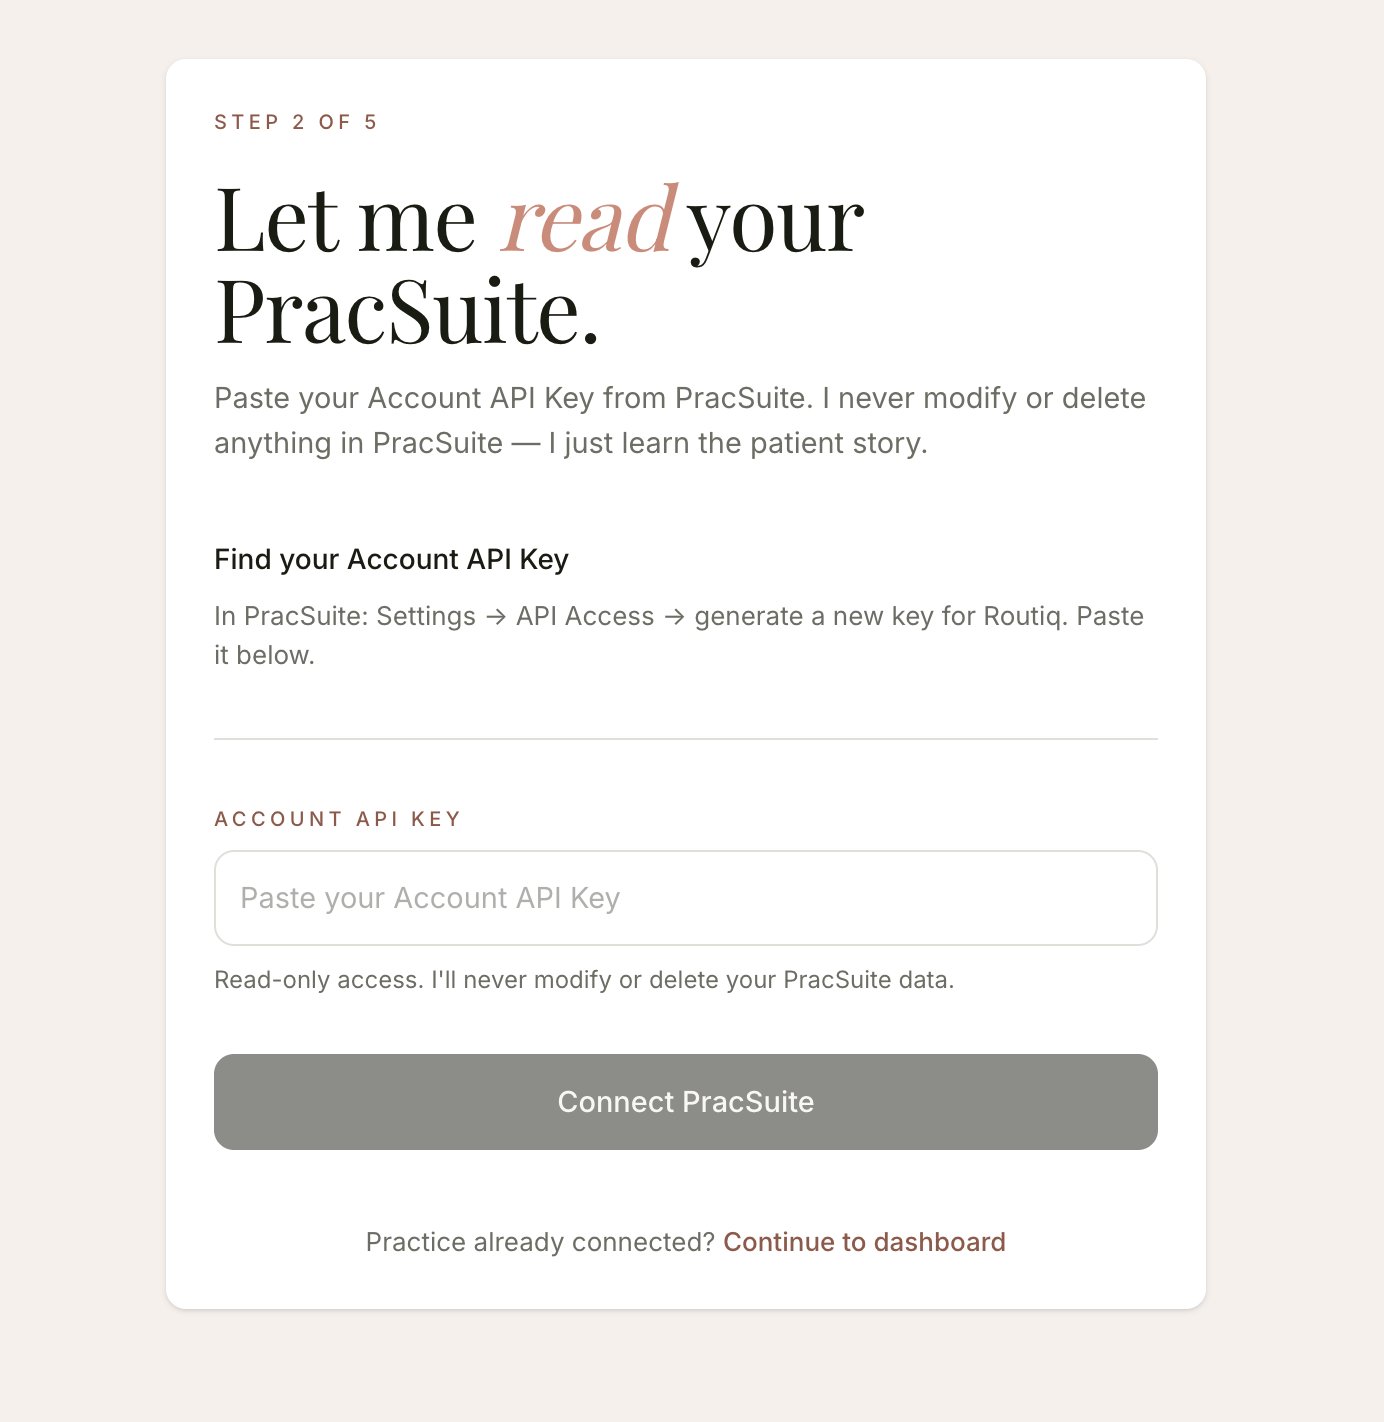
Routiq onboarding: paste your PracSuite Account API Key. Read-only access. - Step 05
Confirm your locations and go live
Map the locations, services and practitioners Robyn should offer. Most clinics are live the same day, and the 7-day free trial lets your team watch it work on real enquiries first.
Permissions
The minimum we need, and what stays off
You do not have to hand over everything to see this work. Two permission groups, both read only, are enough for Robyn to read your diary and offer real appointment times.
Turn on
System Data, read
Your businesses and practitioners, so Robyn knows who works where. Routiq checks this one first, so nothing connects without it.
Appointment Data, read
Appointment types, the diary and live availability. This is what lets Robyn offer a real time instead of a guess.
Leave off
Patient Data
Phone numbers, email addresses and patient records.
Clinical Data
Clinical notes and memos.
Contact Data
Payers, referrers and organisations.
Appointment records still reference a patient ID, and depending on your setup a name. Their contact details sit under Patient Data, which stays off.
Read only means Routiq cannot create, change or delete anything in PracSuite. Booking needs Appointments write access and Patient Data, and that is a decision for when you go live, not for evaluating.
With Patient Data off, patient numbers in Routiq will show as zero. That is expected, not a failed connection.
You can change or revoke these permissions in PracSuite at any time.
Once you are connected
Robyn gets to work. PracSuite stays the source of truth.
- 01Robyn answers calls, SMS and WhatsApp, offering real times from your PracSuite diary and booking straight in.
- 02She works your rebooking report, writing follow-ups for patients due back and booking responders into PracSuite.
- 03Abby checks every outbound message against AHPRA advertising guidance before it leaves. You make the final call.